Three Variables, One Ruined Seam: Diagnosing the Machine-Side Loop That Causes Persistent Puckering
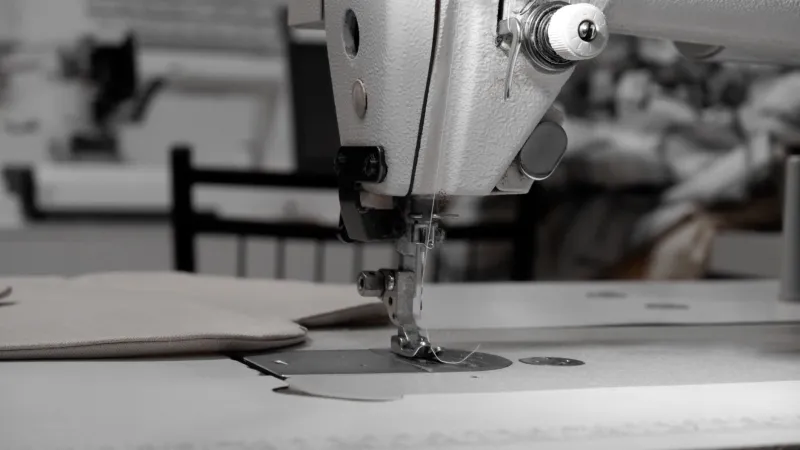
Seam puckering has a reputation for being a fabric problem. And while material properties certainly play a role—thread count, fiber elasticity, and weave density all influence how a seam behaves—some of the most stubborn puckering cases have nothing to do with the fabric at all. They originate at the machine, in the interplay between three mechanical variables that most sewists adjust independently but that function as an interdependent system: needle size, thread tension, and presser foot pressure.
Understanding why these three variables compound rather than simply add together is the key to breaking what experienced tailors sometimes call the puckering loop—a failure cycle in which correcting one setting inadvertently worsens the effect of another.
How the Loop Forms
The mechanics begin with needle penetration. When a needle passes through fabric, it displaces yarn rather than cutting it. The degree of displacement depends on the needle's diameter relative to the spacing of the fabric's woven or knitted structure. A needle that is too large for a fine or tightly woven fabric forces yarns apart aggressively, creating micro-distortions along the stitch line before the thread has even been set.
At this point, thread tension enters the equation. If upper or bobbin tension is even marginally too high, the thread draws the displaced yarns inward as the stitch locks. On a stable, medium-weight fabric, the yarns recover and the seam lies flat. On a lightweight, slippery, or loosely structured fabric, they do not—and the gathering effect becomes visible as a pucker.
Here is where presser foot pressure completes the loop: excessive downward force on the feed dogs compresses the fabric unevenly, particularly at the beginning and end of a seam where feeding resistance changes. This compression alters the effective stitch length and can cause the lower layer of fabric to advance more slowly than the upper layer, introducing differential stretch before the needle even descends. When that differential stretch is released after stitching, the seam contracts unevenly—and puckers.
The loop closes because adjusting any one of these variables without addressing the others frequently shifts the problem rather than resolving it. Reducing thread tension, for instance, may loosen the stitch enough to reduce drawing, but if presser foot pressure remains high, the feed differential continues to distort the seam. The pucker changes character but does not disappear.
Isolating the Primary Culprit
Diagnosing which variable is driving the failure requires a methodical, sequential approach rather than simultaneous adjustment. The following framework is designed to isolate each factor independently.
Step one: Assess needle size first. Before touching tension or pressure settings, confirm that the needle gauge is appropriate for the fabric's weight and structure. As a general principle, lightweight wovens and fine knits require needles in the 60/8 to 70/10 range; medium-weight fabrics call for 80/12; heavier materials move into 90/14 territory and beyond. If the needle is creating visible holes or if the fabric distorts visibly during penetration, sizing down is the correct first move. Needle type matters as well—a sharp or microtex needle minimizes yarn displacement in woven fabrics, while a ballpoint or stretch needle is essential for knits to prevent snags that mimic puckering.
Step two: Test thread tension in isolation. Once needle size is confirmed appropriate, sew a test seam on a folded scrap of the target fabric with the presser foot pressure set to its default or midpoint. Examine the seam for the classic signs of tension imbalance: upper thread visible on the underside indicates excessive upper tension; bobbin thread pulled to the top surface indicates the reverse. Either condition will draw the fabric inward and produce puckering. Adjust in small increments—quarter turns on manual machines, single numerical steps on digital machines—and re-test before concluding that tension is balanced.
Step three: Evaluate presser foot pressure last. With needle and tension confirmed, reduce presser foot pressure incrementally and observe whether the seam quality improves, particularly at seam starts and ends. Many domestic machines in the US market offer adjustable presser foot pressure through a dial or screw on the machine head; industrial machines provide more precise calibration. If reducing pressure resolves residual puckering, the feed differential was the remaining contributor. A walking foot or even-feed foot attachment can provide an additional mechanical solution for fabrics prone to layer shifting.
Thread Weight as a Hidden Variable
While the diagnostic framework above focuses on machine mechanics, thread selection deserves separate mention because it interacts with all three primary variables simultaneously. A thread that is too heavy for the fabric adds physical bulk at the stitch line, which the fabric must accommodate by gathering. A thread that is too fine may not provide adequate stitch structure, causing the seam to distort under tension.
For lightweight fabrics—voile, chiffon, fine lawn, or tissue-weight jersey—a 60-weight or finer thread dramatically reduces the mass being forced through the fabric and locked into the stitch. Polyester thread, while durable, has less give than cotton and can exacerbate puckering on natural fiber fabrics that are expected to relax after washing. Matching thread fiber content to fabric fiber content, where possible, ensures that the thread and fabric respond similarly to heat, moisture, and mechanical stress over time.
When the Loop Cannot Be Fully Broken
Some fabric and thread combinations present puckering risk that machine adjustment alone cannot entirely eliminate. Extremely fine wovens, heavily sized fabrics, and certain heat-sensitive synthetics may continue to show minimal puckering even after optimal machine setup. In these cases, supplementary techniques—seam stabilizer tape, tissue paper stitched beneath the seam line and torn away afterward, or a reduction in stitch length to distribute thread pull more evenly—can reduce the visible effect without requiring further machine recalibration.
It is also worth acknowledging that some puckering is inherent to specific seam constructions. Curved seams, princess seams, and seams sewn on the bias will always require more careful management than straight seams on grain, regardless of machine setup. The diagnostic framework described here addresses the baseline mechanical contribution to puckering; construction-specific techniques address what remains.
The Diagnostic Discipline
The persistent appeal of single-cause explanations for puckering—blaming the fabric, or the tension, or the needle alone—reflects the natural desire for simple solutions to frustrating problems. But the three-way interaction between needle size, thread tension, and presser foot pressure is precisely what makes machine-side puckering so difficult to resolve through intuition alone.
Approaching the problem sequentially, with test seams at each stage and adjustments made to one variable at a time, transforms a frustrating guessing process into a traceable diagnostic sequence. For seamstresses working across a range of fabric types and weights, developing this diagnostic habit is among the most durable technical skills the workroom can offer.


